Create C# console application and debug using Visual Studio Code (VS Code)
Are you looking for how to get start with building C# applications using Visual Studio Code (VS Code)? Then you are at the right place. In this article you will learn step by step procedure on how to setup the Visual Studio Code environment for the C# development, create a sample console application with .NET Core, running and debugging the application.
As a prerequisite to develop the C# application in VS Code, you need to install the Visual Studio Code and .NET SDK
Now, go inside the folder “MyFirstConsoleApp” which is created as shown in above picture and run the belowdotnet command to open the console application in VS code.
[pre class="brush:csharp; toolbar: false;" title=""] C:\Projects\MyFirstConsoleApp>code . [/pre]
The above command launches the console app in VS Code as shown below:
For the first time usage of C#, the VS Code will ask you to install the C# extension to support the development using C# as shown below, just consider clicking on Install.
Also, when you open the C# application in VS Code first time, it will ask you to add the assets required to build and debug the console application. Just consider clicking on Yes to add them.
And now, open the Program.cs file by clicking on it from left side panel. You will see a sample line of code “Hello, World!” writing to console as shown below:
With this step we are done with opening C# console application in VS Code. Now let us see how to run this console app.
Run console application
To run the console application in VS Code, launch a new terminal from Terminal menu as shown below:
[pre class="brush:csharp; toolbar: false;" title=""] C:\Projects\MyFirstConsoleApp>dotnet run [/pre]
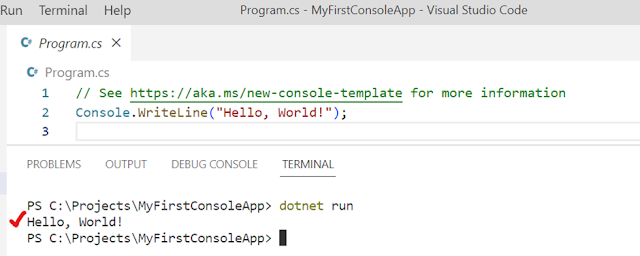
Now you can see the application is ran and written “Hello, World!” message to Terminal.
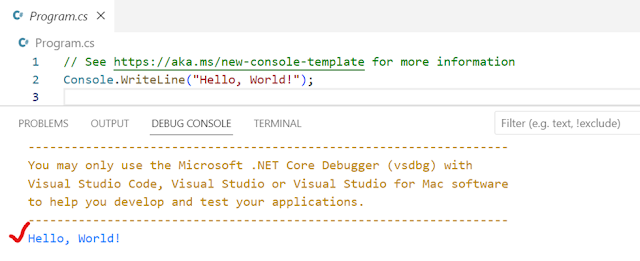
Another way of running the application in VS Code is just press the Ctrl + F5 or go to Run menu and click on “Run Without Debugging” as shown below:
VS Code has a great debugging support it helps you to accelerate the development. To debug the application in VS Code, just press F9 on any line of your program from where you want to start the debugging process.
With this we are done with creating and debugging the C# console application using VS Code. Hope now you have better idea of how to use the Visual Studio Code for building C# application.
Please use the below comment box for any queries or feedback/suggestions. Happy Coding!
Setup Environment
As a prerequisite to develop the C# application in VS Code, you need to install the Visual Studio Code and .NET SDK
You can download and install the latest Visual Studio Code (VS Code) from this link.
VS Code is a free IDE maintained by Microsoft, lightweight and powerful source editor, it can run on Windows, Linux and MacOS.
Also, you can download and install the latest .NET SDK from this link.
Create console application
Let’s get start creating the console application using dotnet commands.
Go to a folder where you want to create console app, in this article I’m referring to C:\Projects folder path in rest of the discussion.
Launch the command prompt from that folder path and use the below dotnet command to create console application.
[pre class="brush:csharp; toolbar: false;" title=""] C:\Projects\MyFirstConsoleApp>dotnet new console -o MyFirstConsoleApp [/pre]
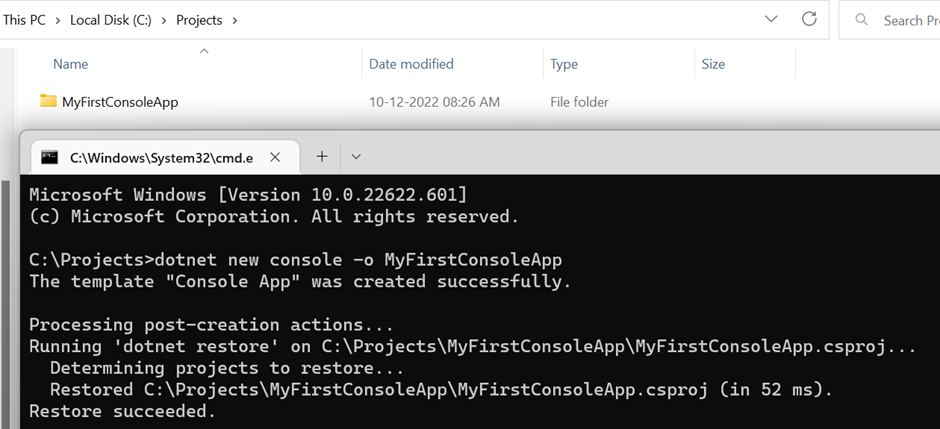
You observed form the above picture that “MyFirstConsoleApp” created and ran thedotnet restore command to load all the dependencies required to run the console application.
[pre class="brush:csharp; toolbar: false;" title=""] C:\Projects\MyFirstConsoleApp>dotnet new console -o MyFirstConsoleApp [/pre]
You observed form the above picture that “MyFirstConsoleApp” created and ran the
Now, go inside the folder “MyFirstConsoleApp” which is created as shown in above picture and run the below
[pre class="brush:csharp; toolbar: false;" title=""] C:\Projects\MyFirstConsoleApp>code . [/pre]
The above command launches the console app in VS Code as shown below:
For the first time usage of C#, the VS Code will ask you to install the C# extension to support the development using C# as shown below, just consider clicking on Install.
Also, when you open the C# application in VS Code first time, it will ask you to add the assets required to build and debug the console application. Just consider clicking on Yes to add them.
And now, open the Program.cs file by clicking on it from left side panel. You will see a sample line of code “Hello, World!” writing to console as shown below:
With this step we are done with opening C# console application in VS Code. Now let us see how to run this console app.
Run console application
To run the console application in VS Code, launch a new terminal from Terminal menu as shown below:
[pre class="brush:csharp; toolbar: false;" title=""] C:\Projects\MyFirstConsoleApp>dotnet run [/pre]
Now you can see the application is ran and written “Hello, World!” message to Terminal.
Another way of running the application in VS Code is just press the Ctrl + F5 or go to Run menu and click on “Run Without Debugging” as shown below:
VS Code has a great debugging support it helps you to accelerate the development. To debug the application in VS Code, just press F9 on any line of your program from where you want to start the debugging process.
From the above you can see that local variables are keep changing while you are debugging the code line by line.
With this we are done with creating and debugging the C# console application using VS Code. Hope now you have better idea of how to use the Visual Studio Code for building C# application.
Please use the below comment box for any queries or feedback/suggestions. Happy Coding!


No comments: